
I found myself constantly playing around with the bleeding edge firmware for the Proxmark3, and needed a way to have a consistent build environment no matter on which of my machines I was working on. Sometimes I’m on the field with my red team prepared laptop, sometimes at the office, and other times I’m just sitter in the sofa at home. And at any point in time one of those machines will be reinstalled and I have to start all over again.
So to be able to quickly download and test a new firmware with my desired configuration I made a build environment based on menuconfig to be run under Kali Linux… because I’m lazy.
The way I did it before
- Download all dependencies
- Change some configurations of my operating system
- Decide on which Proxmark3 repository I wanted to build
- Clone repository
- Change build parameters
- Compile code
- Flash firmware
- Done
Simplified method
- Clone pm3build repository
- Run makepm3
- Done
Clone pm3build repository
# git clone https://github.com/curiousmaster/pm3build.gitRun makepm3
The first time you run this script it will start with the default parameters for my prefered build (see below). Make sure you change them to your likings, specially if you are running an older Proxmark (pre RDV4) or a Chinese clone of the Easy card. This ensures that the firmware is compiled for the correct hardware.
# ./makepm3Set parameters
If you want to change configuration you can do so with menuconfig and then run makepm3 to compile with the new settings.
# make menuconfig
# ./makepm3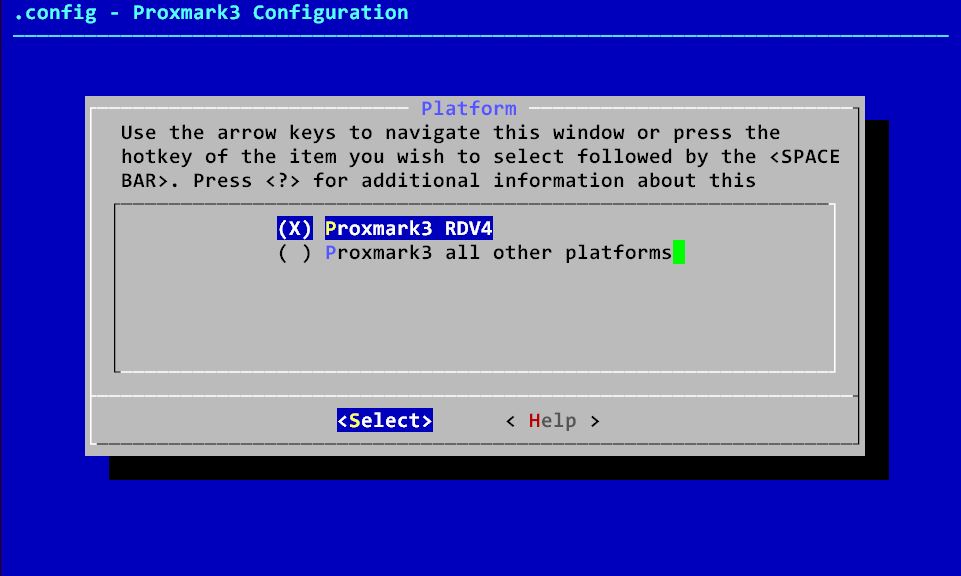
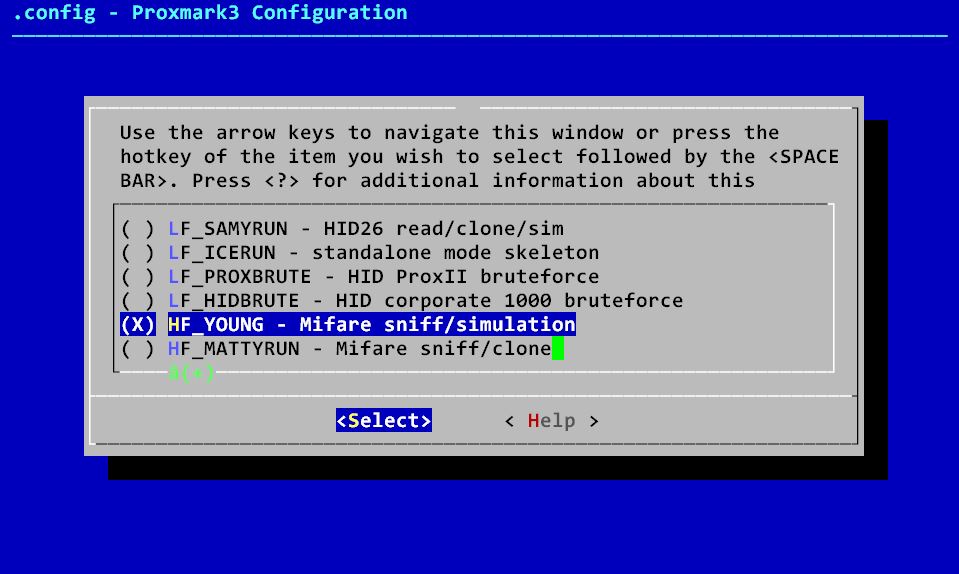
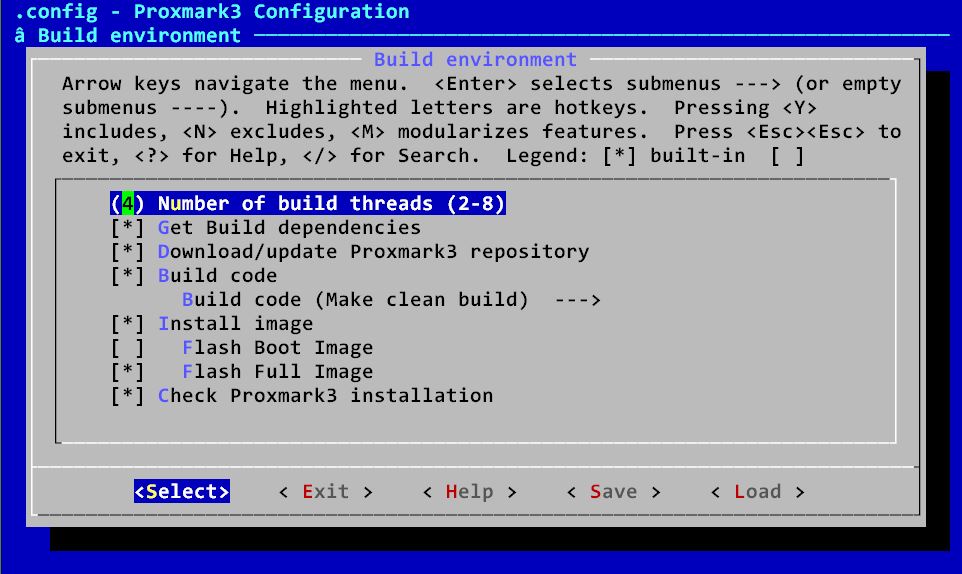
Default parameters
REPO__RfidResearchGroup=y
PLATFORM__PM3RDV4=y
STANDALONE__HF_YOUNG=y

THREADS=4
GETDEPENDENCIES=y
GITDOWNLOAD=y
BUILD=y
BUILDCLEAN=y
INSTALL=y
FLASHFULL=y
CHECKVERSION=y